Creating a Team from an existing O365 group

O365 groups make up the sun in the O365 solar system. And every Microsoft Teams team (planet?) must have an O365 group to exist. You’ll also use O365 groups for group email and calendars, defining permissions for private Stream channels, collaborating with group members in Planner, and much more.

When you create a new team from scratch, it automatically creates an O365 group (and a SharePoint site collection). Whomever you invite to that team is added to the O365 group which is also used to define permissions in other apps and services throughout O365.

But let’s say you were using O365 groups before Teams was cool. You don’t want to create duplicate teams or have to manage twice as many, right? Luckily, you can use existing O365 groups to create new teams.

Create a team using an existing O365 group

In Teams, beneath your list of Teams, click Join or create a team.

Click Create team.

Choose Create from…

Next, click Office 365 group.

If you choose Team, it will copy that Team’s apps, settings, and channels to the new Team (without changing the original Team). This might be useful for classes with similar formats, or creating committees or teams based on a well-received template.

But to create a team from our existing O365 group, we’re going to select Office 365 group.

Now select the existing O365 group for which you’re establishing a new Team, then click Create.

After a moment, your new Team will be created and you’ll be taken to its landing page.
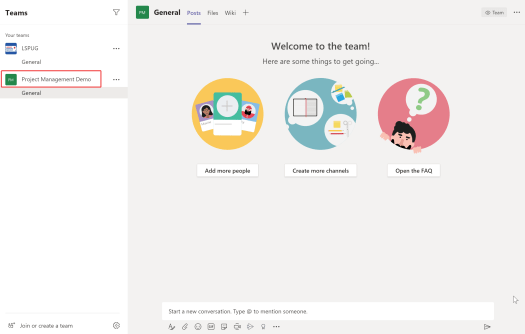
You can verify membership is correct by opening the Team’s menu (ellipses) and selecting Manage team. This

Here you can view owners, members, and guests from the O365 group. You can now modify the O365 group’s membership here if you wish, keeping in mind it affects permissions outside of Teams as well (as is the nature of O365 groups).

Microsoft recommends modifying O365 group permissions via Teams because doing so elsewhere (such as the M365 admin center) will cause a delay in taking effect and removed team members may retain Teams chat access for a couple hours.

Reorder and organize SharePoint tasks and timelines

The Tasks app (or Task list) in SharePoint has many features to help your team communicate and stay on track. You can group tasks into buckets by designating some tasks as subtasks to others. You can also specify any order of tasks, and groups of tasks, that you wish. The built-in timeline web part polishes off the task list, providing a visual representation of the tasks and phases that matter most.

Note: See bottom of post for a video demo.

Create a new subtask

To create a subtask of an existing task (thereby creating a “group”) just select the ellipses next to the parent task to open the task menu and choose “Create subtask.”


Reorder tasks

You can reorder tasks, and groups of tasks, by using the “Move up” and “Move down” buttons on the Tasks ribbon. First, select the task (or parent task of a group). Then from the Tasks menu, choose Move up or Move down.

Click to enlarge

Change an existing task to a subtask of another

If you’ve already created your tasks and need to rearrange and organize them later, you can do so.

  1. Select the task(s) you want to change into subtasks.
  2. Use Tasks > Move Up and Tasks > Move Down until the task is positioned beneath the intended “parent” task.
  3. Use “Indent” to make it a subtask of its predecessor.
Click to enlarge

To “promote” a task, you’d do the opposite, using the “Outdent” option to move a task back up a level in the hierarchy.

Create multiple layers of task groups

Using the “indent” and “outdent” options seen in the previous section, you can create many layers of tasks that can expand and collapse for a clean and organized user experience.

Add and remove tasks from the timeline

SharePoint won’t automatically add tasks to the timeline for you. This could get cluttered fast. Instead, be selective in what you choose to show on your timeline. Perhaps those that are part of the current phase or upcoming date ranges. Avoid getting too granular in what shows in this “overall” visual representation.

To add a task to the timeline, open that task’s menu and choose “Add to Timeline.”

To remove a task, simply select it on the timeline, then “Remove from Timeline

Change date range “bars” to “callouts” on the timeline

To create a cleaner appearance, you could explore changing the “bars” on your timelines to callouts. Callouts appear as brackets encompassing the date range they’re associated with and may be easier to read for some.

  1. Select the bar
  2. Click “Display as Callout” from Timeline menu
Click to enlarge

Video demonstration

The following video demonstrates a few of these tips when working with SharePoint tasks and timelines.

  • Change display format of date ranges on timelines
  • Create subtasks
  • Rearrange and reorder tasks
  • Promote/demote tasks
  • Add/remove tasks from timeline

Remove background from images using Office apps

Most of us have Office apps installed on our machine. But not everybody has, or can afford, Photoshop. Luckily, Office apps (PowerPoint, Word, Excel, and Outlook) have built-in image editing features that can do much of your basic image editing needs, including removing backgrounds from images.

I prefer to use PowerPoint, myself, but you can use whichever app you’re comfortable with or already creating within. When finished editing, you can right click the modified image to save it as an independent image file to be used elsewhere.

Note: Video demonstration at bottom of post.

Remove the background

Here are the few simple steps to start removing backgrounds from images:

  1. Select your image
  2. Picture Tools > Format will become an option once the image is selected. Click it.
  3. Select Remove Background

PowerPoint (or whichever app you’re using for this) will guess what you want to remove by highlighting it in pink.

Make corrections using the “Mark Areas to Keep” and “Mark Areas to Remove” buttons in the ribbon.

In the following animation, I’m choosing to “Mark Areas to Keep.” Once you’ve selected an option, click and drag your cursor over the pink-highlighted parts of the image you want to keep. Then select “Keep Changes” to save, removing the pink areas, and view the result.

Click to enlarge

If you’ve discovered you’ve made a mistake or want to keep or remove additional areas in the image, you can select the image again, choose “Remove Background” and continue the steps above until the result is to your liking. If you decide you want to restore the background and undo your changes, you can choose “Discard All Changes.”

Save the image(s)

When finished, you can save the modified image (which will preserve the transparent background) by right-clicking your result and choosing “Save as Picture.”

If you want to combine multiple edited images into a single image file, as in the following example, group the images first.

  1. Select an image
  2. Select all (Ctrl+A) to select all images
  3. Right click a selected image > Group > Group
  4. Right click the new group > Save as Picture

Video demo

Here’s a video showing this process on multiple image types, layering those images into a final result.

Workaround: Export to Excel not working in Safari, Chrome, or other non-IE browsers for SharePoint server list exports

The problem

If you’re using SharePoint Online (M365) you won’t run into this issue. But for those of you, like me, who are still on SharePoint 2013 or 2016 you may have tried to use “Export to Excel” on a SharePoint list or library and received the following error message:

To export a list, you must have a Microsoft SharePoint Foundation-compatible application.

Clicking “OK” only redirects you to page that is most definitely not an Excel export:

The workaround

Using Internet Explorer to open and export your SharePoint list might be the simplest way to export your list. However, some are unable to use IE.

If you can’t download or use Internet Explorer (IE) you can still get your lists exported to Excel by working in reverse. Rather than export from SharePoint we are going to open Excel and import from SharePoint.

1. Open a blank workbook in Excel

2. Navigate to the Data ribbon –> Get Data > From Other Sources > From SharePoint List

Note: There are two SharePoint list options under Get Data. Do not select From Online Services > From SharePoint Online list (this option would be for O365 only and O365 users will not need this post’s workaround).

3. Paste the URL to your SharePoint site. You can paste the URL to the list you’re wanting to import, but delete everything after the site’s name in the URL.

4. Click OK.

5. Select Windows and leave credentials as the default “Use my current credentials” unless you have reason to access the list as another account (perhaps a service account which may be able to retrieve all items even with restricted item-level permissions).

6. Click Connect.

7. Find the name of the list you want to import, select it, and click Load.

Click to enlarge

8. Depending on the size of your list, this may take a while. Once imported, you’ll find all of your data as well as some SharePoint metadata associated with your list items.

Click to enlarge

While not ideal, it doesn’t take long to do and you do get the result you’re looking for (with a bit of cleanup, deleting unnecessary columns and such).

Some things to keep in mind:

  • Exporting from SharePoint using IE allows you to export a view.
  • Importing from SharePoint using Excel imports every single list item and column, regardless of view.
  • You’re only able to import items to which you at least have view permissions.

On-premises data gateway for Power BI, Power Automate (Flow), and Power Apps

On-premises data gateways allow users to connect online services like Power BI service, Power Automate (formerly Microsoft Flow), and Power Apps to their on-premises data sources such as SharePoint Server, SQL databases, and network file shares.

The gateway has allowed me to use modern services like Power Automate to bring advanced functionality to my SharePoint 2013 and 2016 lists and libraries, such as copying items across site collections (not possible in SharePoint Designer). I’ve also been able to share Power BI data visualizations and reports of limited on-prem data sources such as SQL databases with off-prem consumers who wouldn’t otherwise have access to that data.

One data gateway will cover all three apps – you don’t need separate gateways for each app/service. You can, however, have two gateways per machine but a max of one per mode:

  • Regular mode (share access to data)
    • Multiple users
    • All services (BI, Automate, Apps)
    • Supports Power BI scheduled refresh and live query
  • Personal mode (others don’t need access to data)
    • One user
    • Only works with Power BI
    • Only supports Power BI scheduled refresh

Install a gateway

The following steps are adapted from documentation available on Microsoft Docs. Please read all available information (see “More info” section at bottom of post) prior to installing a gateway to make sure you’re configuring it correctly for your organization’s needs.

  1. Download and install the gateway
    • Install on a server/computer that is always on to make sure Flows and refreshes aren’t disrupted due to the gateway being unavailable on a powered down machine. You might consider installing multiple gateways and creating a gateway cluster for high availability or load balancing in case a server goes down.
    • Install on a personal/work computer if it will only be used by one person or machine manually (perhaps for those building Power BI reports without automatic refreshes). This is not ideal for scheduled flows or data refreshes as the machine may be powered down.
    • Note: You can restrict who is allowed to install on-premises data gateways for your organization.
  2. Configure the gateway.
  3. Add gateway admins
    • By default, the individual/account that installs a gateway is a gateway admin. You can manage admins, adding other security groups or individuals as needed.
  4. Use the gateway to refresh an on-premises data source such as a SQL database (specific to Power BI).
  5. Troubleshoot gateways

Share a data gateway

To manage gateways from your apps, follow these paths;

  • Power Automate –> Settings wheel –> Gateways
  • Power Apps –> Data –> Gateways
  • Power BI –> Settings wheel –> Manage gateways

In Power Automate and Power Apps, your options are identical from here. You can view additional information on existing gateways, download another gateway, and share or delete existing gateways.

If you share gateways with others, you get a dialog with the option to include everyone in the organization. This way anyone could have access to the gateway to use in their own Flows, apps, and reports. And unless a user is an admin, they can’t reconfigure the gateway :

When you share a gateway with others, you can provide these levels of access within Power Automate and Power Apps (not Power BI):

  • Can use (for those just using apps)
  • Can use + share (for those sharing apps, which will automatically share the gateway)

More info on these levels available here.

When assigning permissions, you can specifically allow these permissions:

In all three apps, you can make someone else (or a security group) an admin. If you make another user an admin of a gateway, they have the same rights as you to manage the gateway and its configuration in its entirety.

More information from Microsoft Docs

Restrict who can install on-premises data gateways for the Power Platform

Data gateways allow users to connect online services, such as Power BI service, Power Automate, and Power Apps to on-prem data sources such as SQL databases, SharePoint server lists and libraries, and network shares.

As you can imagine, you wouldn’t want everyone installing their own individual gateways throughout your organization. Managing and sharing those centrally is much more efficient (and secure). You can manage who is allowed via the Power Platform admin center at admin.powerplatform.microsoft.com.

Note: You must be one of these roles to restrict gateway installers:

  • Azure AD Global administrator
  • Office 365 Global admin
  • Power BI service administrator

Restricting installations does not impact gateway administration. You can assign and re-assign users to administer and use gateways at any time. The following steps are strictly to manage who is able to install an enterprise gateway on a machine.

1. Go to the Power Platform admin center

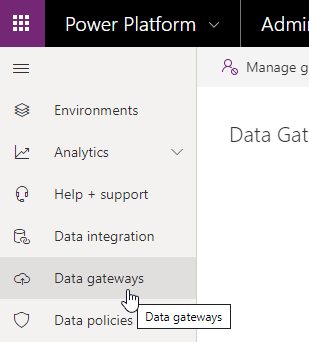
2. Click “Data gateways”

3. Click “Manage gateway installers”

4. Toggle “On” the Restrict users in your organization from installing gateways

Click to enlarge

5. Add authorized users.

In just a few clicks, you’ve enabled better management of enterprise access to on-premises data sources for scheduled data refreshes, apps, and flows.

Click to enlarge

Introducing the “File Upload” question type for Microsoft Forms

I received a message yesterday in my message center announcing “File Upload” as a new question type coming to Microsoft Forms soon. It’s currently listed as “In development” to be released this month. The message is as follows:

Click to enlarge

Why is this awesome?

This highly anticipated feature makes Forms more competitive with third-party form solutions such as Survey Gizmo and Survey Monkey.

Where will the files go? Group forms are stored in SharePoint, while personal forms are stored in your OneDrive.

As a form creator, you’re able to configure the following restrictions on the “File Upload” question type:

  • Max number of files
  • Max size of files
  • Accepted file types

You might use this question type in endless new ways, but here are some usage ideas:

  • Contract review requests
  • Solicit resume and cover letter uploads from internal candidates
  • Video and photo contests
  • Headshot updates
  • Data analytics requests
  • Writing competitions
  • Newsletter and marketing media submissions (articles, photos, videos, etc.)

Update 12/15/2019: File upload not available for external forms. Only available when form is set to “Only people in my organization can respond.” This may impact your usage ideas. Thanks to my friend Phil Worrell for sharing this.

Image courtesy of Phil Worrell (@Worrelpa) – Click to enlarge

Stay updated

If you’re like me, you’re likely to just make a form one day and notice the new “File Upload” option has become available. But for those of you wanting to know the minute it’s released, keep an eye on your message center. If you’re not an admin you can watch the roadmap for updates:

Roadmap item 59334: https://www.microsoft.com/en-us/microsoft-365/roadmap?filters=&searchterms=59344

Create a direct link/URL to version history for a SharePoint list item or file

Imagine getting an email with a direct link to review the version history of an item or file. Or being able to have a single click from a list view to an item’s version history without going through menus.

The link itself is easy to structure manually. You could also structure it automatically using SharePoint Designer workflows or Power Automate flows.

No matter your method, you’ll need to be able to get two pieces of information: the list GUID and the item/file ID.

Getting required info

Get the list GUID

The list GUID is easy to get. Just go to the list –> List Settings and copy everything in the URL after List=.

Click to enlarge

Example:

http://SiteURL/_layouts/15/listedit.aspx?List=%7BAC2DE34F%5GH6IJ%KL789M%N01OP2%QR3STUV4WX4YZ56%7D

Get the item/file ID

In SharePoint Designer or Power Automate, you can just use the ID field provided as a lookup option. This way it’s always dynamic.

But to get the ID manually without workflow, view/open the item and check the end of the URL: for the number following “ID=”. Example:

http://SiteURL/ListName/DispForm.aspx?ID=532

For document libraries, or if you’re using modal dialogs (pop-ups), your URL won’t show ID. In this case, you can add the default ID column to your list view to get it.

Tip: For list items (not documents) you can also hover your pointer over the link to the item to see the URL preview at the bottom of your browser before clicking it.

Building the link

Manually construct it

The basic structure, no matter which method you use, is as follows:

https://SiteURL/_layouts/15/Versions.aspx?list=GUID&ID=ID

Just replace the SiteURL, list GUID, and item/file ID.

Tip: The easiest way may be to copy the entire URL when getting the list GUID, change listedit to versions, and add &ID=ID to the end.

Use SharePoint Designer

In SharePoint Designer, you can use String Builder when creating hyperlinks in emails, or when populating fields (such as a hyperlink column).

Click to enlarge

Use Power Automate

In Power Automate, you can initialize a variable to structure the version history URL so that you can use it repeatedly in different steps/conditions without having to structure it every time. We do this similarly to how we did for SharePoint Designer above. Type almost the entire URL which doesn’t change, then use the dynamic content panel to add ID to the end.

Click to enlarge

Then you can send an email and use a little code to hyperlink text with the variable used as the URL. If you’re not comfortable with code, you can just put the entire URL in the body of the message. The following shows an Outlook step in “Code View.”

First, click “Code View”

Alternative ideas

Calculated column

Note: You could use a calculated column for this, but the [ID] field needed will only populate once, then remove itself on the next property edit. The only way around this is creating another column like ID1 as single line of text and using a workflow (SPD or Power Automate) to set that field to the ID number. Then you can use [ID1] in your calculated column with a formula such as this:

="https://site/_layouts/15/Versions.aspx?list=GUID&ID="&[ID1]

Hyperlink column

Consider using SharePoint Designer or Power Automate to set a “hyperlink” type field to the URL. This could then be used in a list view to have a one-click link to version history.