In my latest video, “How to Add the Current User’s Profile Photo to Your Power Apps Easily,” I guide you through the process of personalizing your canvas apps in Power Apps by displaying the current user’s profile photo.
Why Personalize Your Power Apps?
Adding user-specific elements, like profile photos and their name, enhances the user experience by making applications more engaging and tailored to individual users. It also gives a user confidence that they’re logged in to the correct account and accessing data specific to them. It also fosters a sense of connection and can improve user adoption rates.
Step-by-Step Guide to add users’ profile photos to your app
- Set Up the Office 365 Users Connector:
- Navigate to the Data panel in your Power App. (Is your data panel missing? Check out my workaround.)
- Select Add data and search for Office 365 Users.
- Select the connector to add it to your app.

- Insert the Image Control:
- Go to Insert and choose Image from the Media section.

- Place the image control where you’d like the profile photo to appear.
- Go to Insert and choose Image from the Media section.
- Configure the Image Property:
- With the image control selected, set its Image property to:
Office365Users.UserPhotoV2(User().Email) - This formula retrieves the profile photo of the current user based on their email address.
- With the image control selected, set its Image property to:
- Handle Missing Profile Photos and Related Errors:
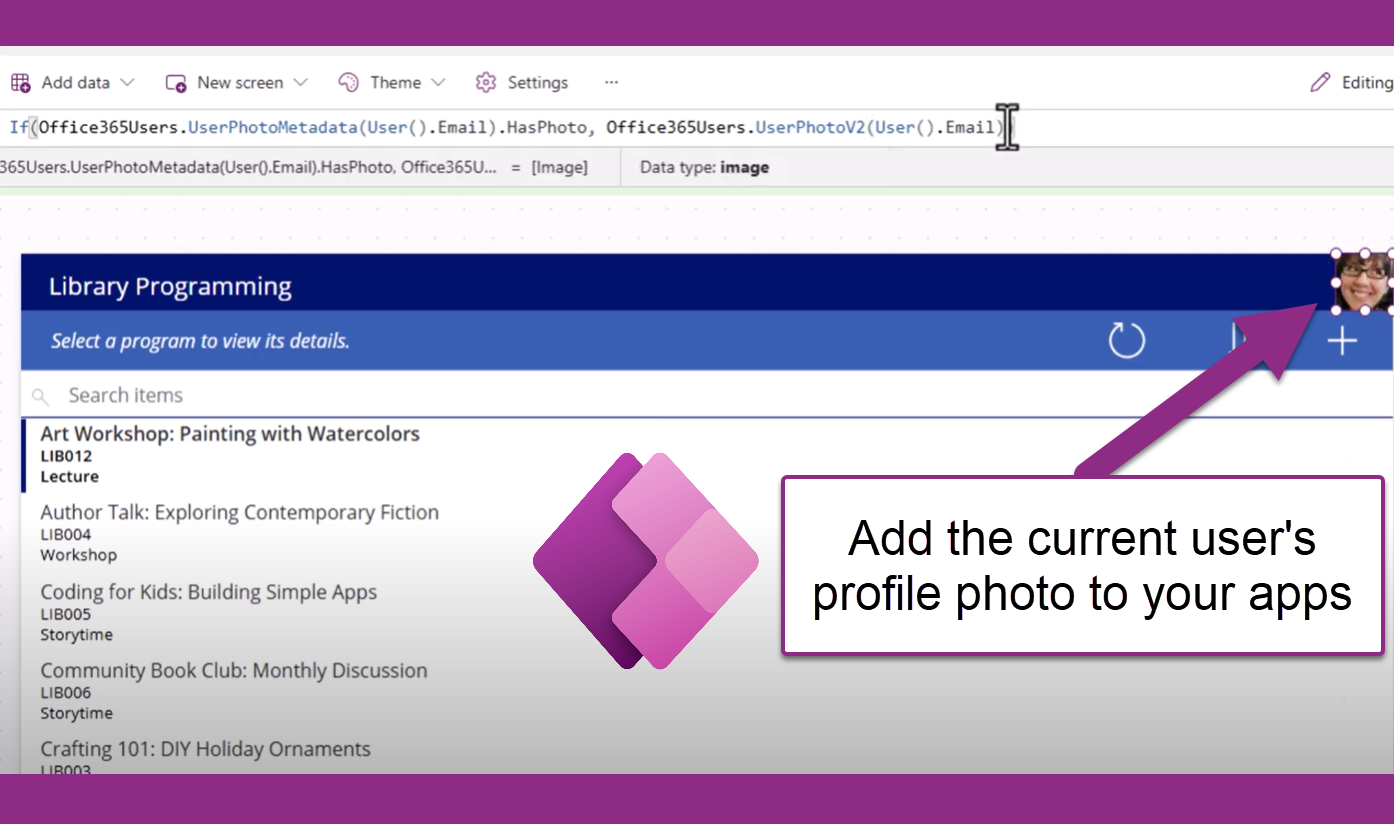
- Not all users may have a profile photo. To display a default image when a photo is unavailable, use the following for the Image property instead:
If(Office365Users.UserPhotoMetadata(User().Email).HasPhoto, Office365Users.UserPhotoV2(User().Email),"DefaultImageURL") - Replace
"DefaultImageURL"with the URL of your default image, or the name of an image you’ve already uploaded in the app itself (no double quotes necessary in that case, as seen in the following screenshot).
- Not all users may have a profile photo. To display a default image when a photo is unavailable, use the following for the Image property instead:
Conclusion
By following these steps, you can enhance your Power Apps with personalized user experiences, making your applications more intuitive and user-friendly. For a detailed walkthrough, check out the video below:
Leave a Reply