Remove background from images using Office apps

Most of us have Office apps installed on our machine. But not everybody has, or can afford, Photoshop. Luckily, Office apps (PowerPoint, Word, Excel, and Outlook) have built-in image editing features that can do much of your basic image editing needs, including removing backgrounds from images.

I prefer to use PowerPoint, myself, but you can use whichever app you’re comfortable with or already creating within. When finished editing, you can right click the modified image to save it as an independent image file to be used elsewhere.

Note: Video demonstration at bottom of post.

Remove the background

Here are the few simple steps to start removing backgrounds from images:

  1. Select your image
  2. Picture Tools > Format will become an option once the image is selected. Click it.
  3. Select Remove Background

PowerPoint (or whichever app you’re using for this) will guess what you want to remove by highlighting it in pink.

Make corrections using the “Mark Areas to Keep” and “Mark Areas to Remove” buttons in the ribbon.

In the following animation, I’m choosing to “Mark Areas to Keep.” Once you’ve selected an option, click and drag your cursor over the pink-highlighted parts of the image you want to keep. Then select “Keep Changes” to save, removing the pink areas, and view the result.

Click to enlarge

If you’ve discovered you’ve made a mistake or want to keep or remove additional areas in the image, you can select the image again, choose “Remove Background” and continue the steps above until the result is to your liking. If you decide you want to restore the background and undo your changes, you can choose “Discard All Changes.”

Save the image(s)

When finished, you can save the modified image (which will preserve the transparent background) by right-clicking your result and choosing “Save as Picture.”

If you want to combine multiple edited images into a single image file, as in the following example, group the images first.

  1. Select an image
  2. Select all (Ctrl+A) to select all images
  3. Right click a selected image > Group > Group
  4. Right click the new group > Save as Picture

Video demo

Here’s a video showing this process on multiple image types, layering those images into a final result.

Workaround: Export to Excel not working in Safari, Chrome, or other non-IE browsers for SharePoint server list exports

The problem

If you’re using SharePoint Online (M365) you won’t run into this issue. But for those of you, like me, who are still on SharePoint 2013 or 2016 you may have tried to use “Export to Excel” on a SharePoint list or library and received the following error message:

To export a list, you must have a Microsoft SharePoint Foundation-compatible application.

Clicking “OK” only redirects you to page that is most definitely not an Excel export:

The workaround

Using Internet Explorer to open and export your SharePoint list might be the simplest way to export your list. However, some are unable to use IE.

If you can’t download or use Internet Explorer (IE) you can still get your lists exported to Excel by working in reverse. Rather than export from SharePoint we are going to open Excel and import from SharePoint.

1. Open a blank workbook in Excel

2. Navigate to the Data ribbon –> Get Data > From Other Sources > From SharePoint List

Note: There are two SharePoint list options under Get Data. Do not select From Online Services > From SharePoint Online list (this option would be for O365 only and O365 users will not need this post’s workaround).

3. Paste the URL to your SharePoint site. You can paste the URL to the list you’re wanting to import, but delete everything after the site’s name in the URL.

4. Click OK.

5. Select Windows and leave credentials as the default “Use my current credentials” unless you have reason to access the list as another account (perhaps a service account which may be able to retrieve all items even with restricted item-level permissions).

6. Click Connect.

7. Find the name of the list you want to import, select it, and click Load.

Click to enlarge

8. Depending on the size of your list, this may take a while. Once imported, you’ll find all of your data as well as some SharePoint metadata associated with your list items.

Click to enlarge

While not ideal, it doesn’t take long to do and you do get the result you’re looking for (with a bit of cleanup, deleting unnecessary columns and such).

Some things to keep in mind:

  • Exporting from SharePoint using IE allows you to export a view.
  • Importing from SharePoint using Excel imports every single list item and column, regardless of view.
  • You’re only able to import items to which you at least have view permissions.

On-premises data gateway for Power BI, Power Automate (Flow), and Power Apps

On-premises data gateways allow users to connect online services like Power BI service, Power Automate (formerly Microsoft Flow), and Power Apps to their on-premises data sources such as SharePoint Server, SQL databases, and network file shares.

The gateway has allowed me to use modern services like Power Automate to bring advanced functionality to my SharePoint 2013 and 2016 lists and libraries, such as copying items across site collections (not possible in SharePoint Designer). I’ve also been able to share Power BI data visualizations and reports of limited on-prem data sources such as SQL databases with off-prem consumers who wouldn’t otherwise have access to that data.

One data gateway will cover all three apps – you don’t need separate gateways for each app/service. You can, however, have two gateways per machine but a max of one per mode:

  • Regular mode (share access to data)
    • Multiple users
    • All services (BI, Automate, Apps)
    • Supports Power BI scheduled refresh and live query
  • Personal mode (others don’t need access to data)
    • One user
    • Only works with Power BI
    • Only supports Power BI scheduled refresh

Install a gateway

The following steps are adapted from documentation available on Microsoft Docs. Please read all available information (see “More info” section at bottom of post) prior to installing a gateway to make sure you’re configuring it correctly for your organization’s needs.

  1. Download and install the gateway
    • Install on a server/computer that is always on to make sure Flows and refreshes aren’t disrupted due to the gateway being unavailable on a powered down machine. You might consider installing multiple gateways and creating a gateway cluster for high availability or load balancing in case a server goes down.
    • Install on a personal/work computer if it will only be used by one person or machine manually (perhaps for those building Power BI reports without automatic refreshes). This is not ideal for scheduled flows or data refreshes as the machine may be powered down.
    • Note: You can restrict who is allowed to install on-premises data gateways for your organization.
  2. Configure the gateway.
  3. Add gateway admins
    • By default, the individual/account that installs a gateway is a gateway admin. You can manage admins, adding other security groups or individuals as needed.
  4. Use the gateway to refresh an on-premises data source such as a SQL database (specific to Power BI).
  5. Troubleshoot gateways

Share a data gateway

To manage gateways from your apps, follow these paths;

  • Power Automate –> Settings wheel –> Gateways
  • Power Apps –> Data –> Gateways
  • Power BI –> Settings wheel –> Manage gateways

In Power Automate and Power Apps, your options are identical from here. You can view additional information on existing gateways, download another gateway, and share or delete existing gateways.

If you share gateways with others, you get a dialog with the option to include everyone in the organization. This way anyone could have access to the gateway to use in their own Flows, apps, and reports. And unless a user is an admin, they can’t reconfigure the gateway :

When you share a gateway with others, you can provide these levels of access within Power Automate and Power Apps (not Power BI):

  • Can use (for those just using apps)
  • Can use + share (for those sharing apps, which will automatically share the gateway)

More info on these levels available here.

When assigning permissions, you can specifically allow these permissions:

In all three apps, you can make someone else (or a security group) an admin. If you make another user an admin of a gateway, they have the same rights as you to manage the gateway and its configuration in its entirety.

More information from Microsoft Docs

Restrict who can install on-premises data gateways for the Power Platform

Data gateways allow users to connect online services, such as Power BI service, Power Automate, and Power Apps to on-prem data sources such as SQL databases, SharePoint server lists and libraries, and network shares.

As you can imagine, you wouldn’t want everyone installing their own individual gateways throughout your organization. Managing and sharing those centrally is much more efficient (and secure). You can manage who is allowed via the Power Platform admin center at admin.powerplatform.microsoft.com.

Note: You must be one of these roles to restrict gateway installers:

  • Azure AD Global administrator
  • Office 365 Global admin
  • Power BI service administrator

Restricting installations does not impact gateway administration. You can assign and re-assign users to administer and use gateways at any time. The following steps are strictly to manage who is able to install an enterprise gateway on a machine.

1. Go to the Power Platform admin center

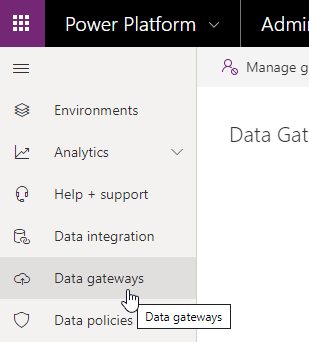
2. Click “Data gateways”

3. Click “Manage gateway installers”

4. Toggle “On” the Restrict users in your organization from installing gateways

Click to enlarge

5. Add authorized users.

In just a few clicks, you’ve enabled better management of enterprise access to on-premises data sources for scheduled data refreshes, apps, and flows.

Click to enlarge

Introducing the “File Upload” question type for Microsoft Forms

I received a message yesterday in my message center announcing “File Upload” as a new question type coming to Microsoft Forms soon. It’s currently listed as “In development” to be released this month. The message is as follows:

Click to enlarge

Why is this awesome?

This highly anticipated feature makes Forms more competitive with third-party form solutions such as Survey Gizmo and Survey Monkey.

Where will the files go? Group forms are stored in SharePoint, while personal forms are stored in your OneDrive.

As a form creator, you’re able to configure the following restrictions on the “File Upload” question type:

  • Max number of files
  • Max size of files
  • Accepted file types

You might use this question type in endless new ways, but here are some usage ideas:

  • Contract review requests
  • Solicit resume and cover letter uploads from internal candidates
  • Video and photo contests
  • Headshot updates
  • Data analytics requests
  • Writing competitions
  • Newsletter and marketing media submissions (articles, photos, videos, etc.)

Update 12/15/2019: File upload not available for external forms. Only available when form is set to “Only people in my organization can respond.” This may impact your usage ideas. Thanks to my friend Phil Worrell for sharing this.

Image courtesy of Phil Worrell (@Worrelpa) – Click to enlarge

Stay updated

If you’re like me, you’re likely to just make a form one day and notice the new “File Upload” option has become available. But for those of you wanting to know the minute it’s released, keep an eye on your message center. If you’re not an admin you can watch the roadmap for updates:

Roadmap item 59334: https://www.microsoft.com/en-us/microsoft-365/roadmap?filters=&searchterms=59344

Create a direct link/URL to version history for a SharePoint list item or file

Imagine getting an email with a direct link to review the version history of an item or file. Or being able to have a single click from a list view to an item’s version history without going through menus.

The link itself is easy to structure manually. You could also structure it automatically using SharePoint Designer workflows or Power Automate flows.

No matter your method, you’ll need to be able to get two pieces of information: the list GUID and the item/file ID.

Getting required info

Get the list GUID

The list GUID is easy to get. Just go to the list –> List Settings and copy everything in the URL after List=.

Click to enlarge

Example:

http://SiteURL/_layouts/15/listedit.aspx?List=%7BAC2DE34F%5GH6IJ%KL789M%N01OP2%QR3STUV4WX4YZ56%7D

Get the item/file ID

In SharePoint Designer or Power Automate, you can just use the ID field provided as a lookup option. This way it’s always dynamic.

But to get the ID manually without workflow, view/open the item and check the end of the URL: for the number following “ID=”. Example:

http://SiteURL/ListName/DispForm.aspx?ID=532

For document libraries, or if you’re using modal dialogs (pop-ups), your URL won’t show ID. In this case, you can add the default ID column to your list view to get it.

Tip: For list items (not documents) you can also hover your pointer over the link to the item to see the URL preview at the bottom of your browser before clicking it.

Building the link

Manually construct it

The basic structure, no matter which method you use, is as follows:

https://SiteURL/_layouts/15/Versions.aspx?list=GUID&ID=ID

Just replace the SiteURL, list GUID, and item/file ID.

Tip: The easiest way may be to copy the entire URL when getting the list GUID, change listedit to versions, and add &ID=ID to the end.

Use SharePoint Designer

In SharePoint Designer, you can use String Builder when creating hyperlinks in emails, or when populating fields (such as a hyperlink column).

Click to enlarge

Use Power Automate

In Power Automate, you can initialize a variable to structure the version history URL so that you can use it repeatedly in different steps/conditions without having to structure it every time. We do this similarly to how we did for SharePoint Designer above. Type almost the entire URL which doesn’t change, then use the dynamic content panel to add ID to the end.

Click to enlarge

Then you can send an email and use a little code to hyperlink text with the variable used as the URL. If you’re not comfortable with code, you can just put the entire URL in the body of the message. The following shows an Outlook step in “Code View.”

First, click “Code View”

Alternative ideas

Calculated column

Note: You could use a calculated column for this, but the [ID] field needed will only populate once, then remove itself on the next property edit. The only way around this is creating another column like ID1 as single line of text and using a workflow (SPD or Power Automate) to set that field to the ID number. Then you can use [ID1] in your calculated column with a formula such as this:

="https://site/_layouts/15/Versions.aspx?list=GUID&ID="&[ID1]

Hyperlink column

Consider using SharePoint Designer or Power Automate to set a “hyperlink” type field to the URL. This could then be used in a list view to have a one-click link to version history.

Pass URL parameter to SharePoint new form (NewForm.aspx) to auto-populate a lookup field

I recently received a request to create an education listing of courses where a user could “Register” easily for upcoming opportunities. This required creating two lists: one for courses and another for the registrations.

The most important part of this was that when a user clicked “Register Here” on a calendar item, it would take them to this separate registration form on a completely different list and auto-populate the Training lookup drop-down based on which “Register Here” link they clicked.

Courses list (calendar app)

The first list for courses, Courses, is a calendar app with the courses. It has two necessary columns you must add:

  • A calculated column called Training: =IF([End Time]>=NOW(),(TEXT([Start Time],”YYYY-MM-DD HH:MM AM/PM”)&” | “&Title),””)
  • A custom hyperlink-type field called Register Here. The value is set by a simple SharePoint Designer workflow.

The link is structured so that when clicked, it’ll take the user to the NewForm.aspx form for the registrations list (ContinuingEdRegistration). The user will enter their info there to register for the course.

For the workflow, I used a simple two-step 2010 platform workflow for the Courses list, set to trigger on creation OR change.

When setting the variable in the workflow:

  1. Click the ellipses (three dots) to open “String builder”
  2. Paste the normal link to the second list’s NewForm.aspx page (ContinuingEdRegistration in my example)
  3. Add ?Training= to the end of it, replacing Training with whatever URL parameter you’re wanting to use to help in auto-populating a field
  4. Click “Add or change lookup” to add Current Item –> ID
  5. Add a comma and a space (will not work without space)
  6. Enter link text, like Register Here

The second (and last) step is to set the hyperlink field we created (Register Here) to that variable from the first step. Publish the workflow.

You can set the calendar view to whatever works best – an actual calendar, a list, boxed, etc. as long as the registration link is available to users to click.

ContinuingEdRegistration list (Custom list app)

The ContinuingEdRegistration list and new form is simple:

  • A lookup column to our Training on the first list
  • A field for the user being registered

The key to this working is editing this ContinuingEdRegistration’s NewForm.aspx page seen above and adding the following script via a Script Editor web part or Content Editor web part. Thanks to Emiliano Poggi for sharing the script that inspired this solution.

<script type="text/javascript">

function getUrlParameter( name )
{
name = name.replace(/[\[]/,"\\\[").replace(/[\]]/,"\\\]");
var regexS = "[\\?&]"+name+"=([^&#]*)";
var regex = new RegExp( regexS );
var results = regex.exec( window.location.href );
if( results == null ) return "";
else return results[1];
}
 
function populateNewForm()
{
document.getElementById("Training_67194962-c685-4033-8744-701fd9f26beb_$LookupField").value = getUrlParameter("Training");
}
_spBodyOnLoadFunctionNames.push("populateNewForm")
</script>

Be sure to update both the “ID” boxed below, as well as the URL parameter to look for (used in the SPD workflow between ? and =).

Click to enlarge

If you’re unfamiliar with getting element IDs using F12/developer tools, just go to the NewForm.aspx, hit F12, choose the “selector” probably a mouse as seen here and then left-click the element (dropdown) to get its ID. The following screenshot is using Chrome to find the ID (in blue following the # mark):

Click to enlarge

Once you’ve updated the script for your specific fields, you can either copy and paste it into a script editor web part or save the script as a .js file in a folder like Site Assets then reference it in a Content Editor web part like this:

Click to enlarge

Once you’ve pasted a link to the script in the content editor web part properties panel, click OK. Then you can stop editing/save the page to continue.

Testing

To test your solution, just modify or create a new calendar item. Here’s what should happen:

  1. Your SPD workflow runs, setting the “Register Here” hyperlink field to the correct URL with that item’s unique ID included
  2. Your user clicks that hyperlink on the calendar item and is taken to the Registration list’s NewForm.aspx page. Note that the URL should include ?Training=123 or something similar at the end- this is the URL parameter the script is looking for.
  3. The script finds the URL parameter and dynamically updates the dropdown to the lookup choice that matches the ID.
  4. The user completes the rest of the registration fields and saves/submits.

Taking it further

A further enhancement might be adding &source=CoursesListURL to the URL created in the workflow to redirect users to the calendar again after registering.

Ta-da! Best of luck.

Microsoft Delve blogs to be retired; Existing Delve blogs to be deleted in 2020

Thanks to a tweet by Tim Milan of Omaha, I heard today that Microsoft Delve blogs are to be deleted in a few months.

Milan’s news came from Office 365 Premier Support in response to a ticket he’d submitted. The email is as follows:

Click to enlarge

Delve was first announced alongside the Office Graph in 2014 at SharePoint Conference. Even though it’s only been out for a little over five years, the retirement of Delve in general has been a topic of speculation for nearly two years now (and perhaps longer for others). Some have wondered whether to invest time learning and promoting the app anymore, and perhaps this news will help guide those decisions.

Important dates:

The following points are taken from the email body seen above.

  • Beginning December 18th, 2019, tenants can no longer create new Delve blogs.
  • Beginning January 18th, 2020, you can no longer create new posts in existing blogs
  • Beginning April 17th, 2020, existing Delve blogs will be deleted and removed from Delve profiles.

What now?

If you read this post and asked yourself, “What’s a Delve blog?” don’t worry about it. It was a convenient feature that allowed your average user to create and maintain a blog they could share in the organization.

If you read this post and realized you have hundreds of user and group blogs out there to manage and just a few months to figure it out, you have some choices to consider.

The email shown earlier in this post suggests creating communication sites and adding News, Yammer, and Stream web parts for engagement but this isn’t a good plan for all blogs as not all users can create sites for themselves. Even those that can create sites may find site creation and management a bit too complex or too large of a scope compared to running a simple blog.

You could consider creating WordPress or Blogger sites and migrating your posts there. Unfortunately, there is no RSS feed for Delve blogs to export. You’d be manually copying and pasting (or recreating) posts.

You might consider disabling Delve if you’d like to prevent users from beginning something that’ll be removed soon. You can do this through the SharePoint admin center for all users (see directions here). Keep in mind this disables more than just blog creation – read the description before proceeding.

Click to enlarge

No matter what you choose, there’s no easy way forward. I would suggest getting your users involved in saving (print to PDF or copy/paste) posts of importance so that they can be posted as documents elsewhere, or recreated at a later time in another space.

Ready, set, change management!

MS-101 Exam Study Guide

Below you’ll find all exam areas and objectives with related documentation to help you prepare for the exam. Most of the references below are summarized in my exam prep book.

Implement modern device services (30-35%)

Implement Microsoft 365 security and threat management (30-35%)

Manage Microsoft 365 governance and compliance (35-40%)

Make room on your shelf

Check out these two MS-101 exam prep books. The first is written by Nate Chamberlain.

My MS-101 Exam Study Guide Book

Earlier this year, in January 2019, I wrote an MS-100 and MS-101 exams study guide blog post linking to resources to help people prep for both exams. MS-101 in particular seemed to have less available for it, and I jumped at the opportunity to change that. I’m pleased today to be able to add my own, new exam prep book to the listing.

My exam prep guide for MS-101: Microsoft 365 Mobility & Security covers every single objective in the exam description and offers mock questions to help check and solidify learning along the way. Passing MS-101 is a step toward becoming an M365 Certified Enterprise Administrator Expert.

You can currently buy my guide on Amazon or directly through my publisher, Packt.

Get up to speed with planning, deploying, and managing Microsoft Office 365 services and gain the skills you need to pass the MS-101 exam

Key Features

  • Explore everything from mobile device management and compliance,through to data governance and auditing
  • Get to grips with using Azure advanced threat protection and Azure information protection
  • Learn effectively through exam-focused practice exercises and mock tests

Book Description

Exam MS-101: Microsoft 365 Mobility and Security is a part of the Microsoft 365 Certified: Enterprise Administrator Expert certification path designed to help users validate their skills in evaluating, planning, migrating, deploying, and managing Microsoft 365 services. This book will help you implement modern device services, apply Microsoft 365 security and threat management, and manage Microsoft 365 governance and compliance. Written in a succinct way, you’ll explore chapter-wise self-assessment questions, exam tips, and mock exams with answers.

You’ll start by implementing mobile device management (MDM) and handling device compliance. You’ll delve into threat detection and management, learning how to manage security reports and configure Microsoft 365 alerts. Later, you’ll discover data loss prevention (DLP) tools to protect data as well as tools for configuring audit logs and policies. The book will also guide you through using Azure Information Protection (AIP) for deploying clients, applying policies, and configuring services and users to enhance data security. Finally, you’ll cover best practices for configuring settings across your tenant to ensure compliance and security.

By the end of this book, you’ll have learned to work with Microsoft 365 services and covered the concepts and techniques you need to know to pass the MS-101 exam.

What you will learn

  • Implement modern device services
  • Discover tools for configuring audit logs and policies
  • Plan, deploy, and manage Microsoft 365 services such as MDM and DLP
  • Get up to speed with configuring eDiscovery settings and features to enhance your organization’s ability to mitigate and respond to issues
  • Implement Microsoft 365 security and threat management
  • Explore best practices for effectively configuring settings

Who this book is for

This book is for IT professionals looking to pass the Microsoft 365 Mobility and Security certification exam. System administrators and network engineers interested in mobility, security, compliance, and supporting technologies will also benefit from this book. Some experience with Microsoft 365, Exchange servers, and PowerShell is necessary.

Table of Contents

  1. Implementing Mobile Device Management (MDM)
  2. Managing Device Compliance
  3. Planning for Devices and Apps
  4. Planning Windows 10 Deployment
  5. Implementing Cloud App Security (CAS)
  6. Implementing Threat Management
  7. Implementing Windows Defender ATP
  8. Managing Security Reports and Alerts
  9. Configuring Data Loss Prevention (DLP)
  10. Implementing Azure Information Protection (AIP)
  11. Managing Data Governance
  12. Managing Auditing
  13. Managing eDiscovery
  14. Mock Exam 1
  15. Mock Exam 2