
Note: Screenshots and steps from a 2016 environment
There may be times when you have AD accounts showing up in search results that you can’t delete, but need to hide from results. The following sections will guide you through removing specific profiles from your people search results.
Steps:
- Create a mapped property for user profiles
- Use the new property at least once
- Start a full crawl of people source
- Create a managed property mapped to your new user property
- Start a full crawl of site source
- Edit the query on the people search results page
- (optional) If you have “People Results” as “Promoted Results” or “Ranked Result Blocks”
1. Create a mapped property for user profiles
From Central admin, click on “Manage service applications”

Select “user profile service application”

Click “Manage User Properties” under “People”

Select “New Property”

Set the new properties settings as follows:
- Name and display name: RemoveFromPeopleSearch
- Policy Setting: Optional
- Default Privacy Setting: Everyone
- Search settings, Alias: checked
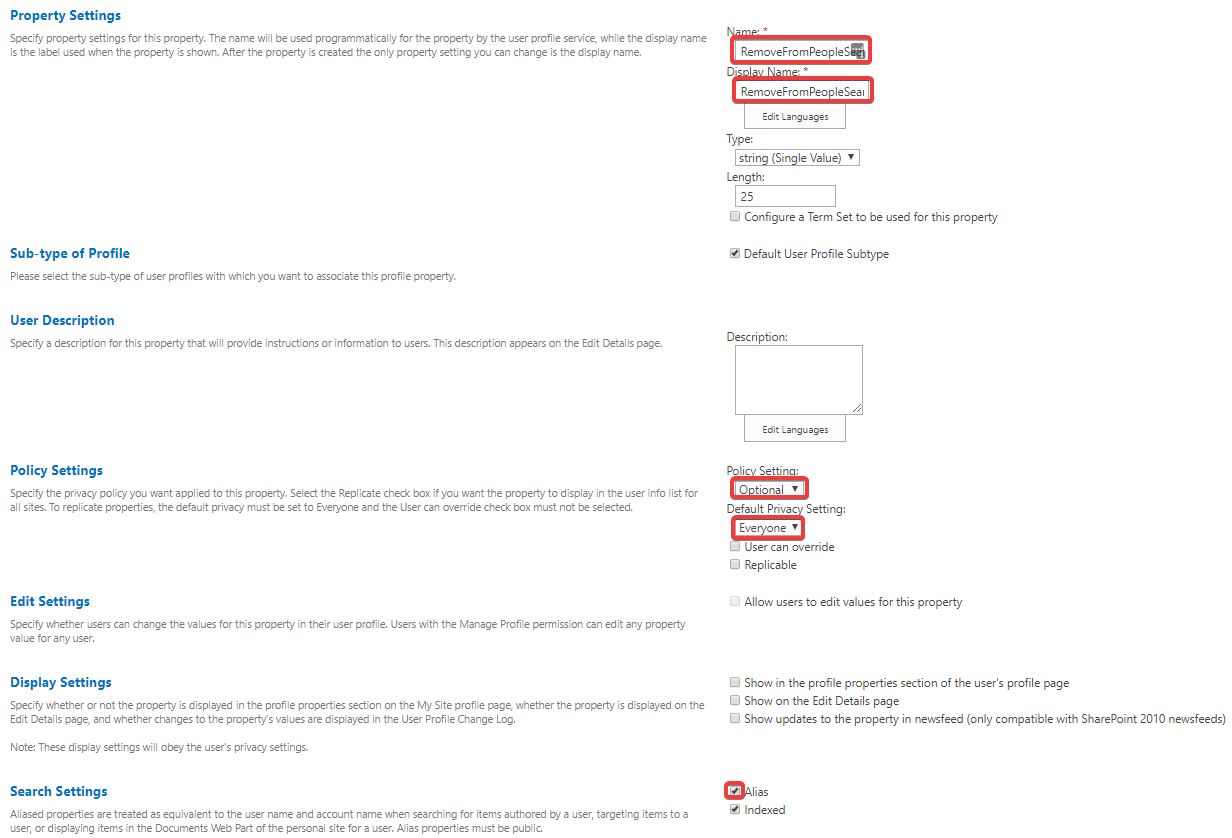
Click OK.
2. Use the new property at least once
For the rest to work, you’ll need to mark at least one user profile to not show up in search. I did this by adding a “1” to the property we just created for a user I wished to remove from results.
Back under “User profile service application” (Central admin –> Manage service applications –> “User profile service application”) click on “Manage user profiles.”

Search for and edit the profile of who you’d like to remove from search results.


Start a full crawl of your people content source.
3. Create a managed property mapped to your new user property
Once the crawl is complete, go back to Central Admin home and select “Manage service applications.”

Select “Search service application”

Select “Search schema” from the left under “Queries and Results”

Select “New managed property”

Name it RemoveFromPeopleSearch and check “Queryable” and “Retrievable”

Scroll down and click “Add a mapping,” search for “remove” and add our new user property.

Click OK

This time, start a full crawl of your SITE content source.
4. Edit the query on the people search results page
Once your crawl is finished (may take a while), you’ll want to go to your people search results page and “Edit page.”

Edit the “Results” web part

In the menu that appears on the right, select “Change Query.”

If you’re not in advanced mode, switch to advanced mode. Then expand the “property filter” dropdown and select “show all managed properties.”

Try the dropdown again, and now you’ll see your new property listed. Select it and click “OK

Set properties as follows and click “Add property filter”

Click OK

Click “Apply” on the web part menu

Click “Save” and publish (if checked out)

5. (optional) If you have “People Results” as “Promoted Results” or “Ranked Result Blocks”
If you have people results outside your regular people search (such as a promoted result block in Local SharePoint Results) you’ll just need to be sure to also add the RemoveFromPeopleSearch<>1 string to the end of your query rule’s query.
Query rules can be accessed through central admin (manage service applications –> search service application –> query rules) or from Site Settings –> Query rules depending on where you initially setup your query rules/promoted results.

via site settings 
via central admin
Edit the query rule in question, click “edit” next to the result block that’s relevant, then “Launch Query Builder” to be able to add the RemoveFromPeopleSearch<>1 string to your query.
