Microsoft 365 training and content for modern digital workplaces
Author: Nate Chamberlain
Nate helps people communicate and collaborate better. He shares solutions and ideas on his blog at http://www.NateChamberlain.com and was awarded Microsoft MVP for Office Apps and Services in recognition of community contributions.
Are you navigating the complexities of digital workspaces and seeking strategies to enhance your organization’s productivity and collaboration? Then you’re in for a treat!
📅 Join me on April 24th at the Intranet Insights 2024 conference, a not-to-be-missed online event dedicated to revolutionizing digital workplaces. And the best part? It’s completely FREE to attend!
This one-day virtual conference, happening on April 24th from 2pm-8pm UTC, is your blueprint for success in the digital era. With expert-led sessions, you’ll be equipped with the knowledge needed to lead your organization’s digital evolution. Check out the full event schedule at https://academy.collab365.com/offer/insights/intranet-insights-2024-free-reg-2/?sld=36.
Why My Session?
In my session, “Harmonizing SharePoint Intranets and Microsoft Teams: A Strategic Duo for Every Organization,” we’ll dive deep into the synergies between SharePoint and Microsoft Teams. You’ll learn how to seamlessly integrate SharePoint’s robust content management system with Teams’ dynamic communication capabilities to create a digital workplace that truly delivers.
What You’ll Gain:
Insider Secrets: Discover the potential of combining SharePoint and Microsoft Teams’ unique strengths, transforming your workspace into a nexus of productivity.
Practical Strategies: Walk away with actionable insights that you can immediately apply to see tangible improvements in your digital workplace.
Networking Opportunities: Connect with a vibrant community of professionals dedicated to digital transformation and intranet excellence.
Exciting times ahead as TechCon365 Seattle approaches, and I’m thrilled to invite you all to join me in a journey through the transformative world of Microsoft 365. This year, I’m leading several sessions aimed at unleashing the full potential of Microsoft 365 for both beginners and advanced users alike. Here’s what you can expect:
Build Your Skills: Microsoft 365 Essentials for Beginners
📅 Monday, 9:00 am – 5:00 pm
Dive deep into the essentials of Microsoft 365 with a focus on OneDrive, SharePoint, and Teams. This full-day workshop is your golden ticket to mastering document co-authoring, file sharing, and understanding the document lifecycle across these platforms. We’ll also explore other critical apps like Planner (which will soon absorb To Do and Project) and Outlook to boost your productivity.
Fix That Intranet! Improve Your Intranet Content, Structure, and Processes
📅 Tuesday, 9:00 am – 12:30 pm
Tired of a cluttered and confusing intranet? This half-day workshop focuses on transforming your SharePoint Online intranet into a well-organized, user-friendly platform. Expect to learn about the theoretical foundations of intranet governance, content strategy, and practical SharePoint applications to streamline your intranet content, structure, and processes.
OneNote Reimagined: A Comprehensive Guide to Modern Note-Taking
📅 Wednesday, 11:30 am – 12:40 pm
Join me as we explore the unified version of OneNote, packed with new features and capabilities. We’ll compare OneNote with other Microsoft productivity tools and dive into practical business applications, ensuring you leverage the right tool for every note-taking task.
How Well Do You Know the Microsoft 365 Desktop Apps? 70 mins of tips & ideas to wow your co-workers
📅 Thursday, 10:30 am – 11:40 am
Prepare to uncover the hidden gems within Word, Excel, PowerPoint, Outlook, and OneNote. This session is designed to reveal the less obvious, yet incredibly useful features that can elevate your work and impress your colleagues.
Cast Votes with Confidence: Crafting a Reusable Power Apps Canvas App Voting Solution
📅 Friday, 10:20 am – 11:30 am
Discover how to build a versatile and reusable voting solution using Power Apps. This session is perfect for anyone looking to engage their community with a secure, efficient voting process or simply to try new ideas in Power Apps.
Special Offer for My Readers
I’m excited to offer a special discount for those planning to attend. Use code NATE100 or register at https://na.eventscloud.com/365educonsea24?discountcode=NATE100 to save $100 on your registration. This is an exclusive opportunity to enhance your skills at a reduced cost, so don’t miss out!
Each session is carefully crafted to provide you with actionable insights, ensuring you leave each one with a deeper understanding of how to effectively utilize Microsoft 365’s suite of tools. Whether you’re new to Microsoft 365 or looking to expand your existing knowledge, these sessions are designed to deliver value at every level.
I can’t wait to meet you all in Seattle. Together, we’ll explore the latest trends, tools, and strategies to make the most out of Microsoft 365. See you there!
If you’ve ever dreamed about diving deeper into the Microsoft 365 and Power Platform worlds without having to become a coding wizard, Collab365 Academy might just be the golden ticket you’ve been searching for. This place is all about turning tech enthusiasts, regardless of their coding skills, into no-code heroes. And guess what? They’re kicking things off with a 7-day free trial, so you can get a taste of the magic without pulling out your wallet.
Why Collab365 Academy is Your Next Big Move
Diverse Learning Paths: Whether you’re eyeing a career in app development with Power Apps, aiming to master automation with Power Automate, or looking to transform data into decisions with Power BI, there’s a path carved out just for you.
Certification Galore: Not only do you learn, but you also get to prove your newfound skills with certifications that matter. Imagine adding a shiny new Credly badge to your LinkedIn profile or employee development file!
From Zero to Hero: Their courses are designed to lead beginners all the way to advanced levels. And for the pros? There’s always new ground to break and more to learn.
Real-World Application: This isn’t about just watching videos or reading an article and calling it a day. Collab365 emphasizes hands-on learning through workshops that tackle real-world problems. You’re not just learning; you’re doing.
Community and Support: Join a global community of learners and experts where you can share, ask, and collaborate. With Collab365, you’re never learning in isolation.
All Things Microsoft 365: For those who want to go big, their Platinum Plan covers over 450 hours of training on everything Microsoft 365. It’s like having a tech university at your fingertips.
The Nitty-Gritty
Start Free: Kick things off with a 7-day free trial. Dive into the courses, connect with the community, and start building something cool.
Flexibility: You can cancel anytime, but something tells me you’ll want to stick around.
Beyond the Trial: After your trial, there’s a whole world of learning, certification, and community waiting for you.
Who’s It For?
Honestly? It’s for anyone curious enough to explore the possibilities of no-code development, automation, and data analysis. Whether you’re looking to shift careers, upskill, or just tackle personal projects in a new way, Collab365 Academy has something for you.
So, why wait? Dive in, start your free trial, and see where this journey takes you. It’s not just about learning; it’s about becoming a part of the future of tech, no coding degree required.
In today’s world, where we’re all glued to our screens, email still reigns supreme in the workplace. But there’s a sneaky little habit that’s possibly chipping away at its value: the rampant use of “Cc” (carbon copy) and “Bcc” (blind carbon copy) features. Sure, looping in a bunch of people on an email might seem like a good idea, but doing it too much can lead to several problems, from making everyone less productive to accidental privacy oopsies. Let’s break down why you might want to think twice before hitting that Cc button too eagerly.
Information Overload
First up, copying a bunch of people on emails is a fast track to information overload. We’re all dealing with an avalanche of messages every day, and adding more to the pile—especially when they’re not super necessary—can make it even harder to keep up. This can mean your super important email gets lost in the shuffle, and that’s not helping anyone.
Productivity Down the Drain
Every time someone gets an email that’s not really for them, it’s a distraction. Reading and figuring out what to do with it (if anything) eats into time that could be spent on their actual job. It’s like every unnecessary email is a little productivity vampire, sucking away at the efficiency of the whole team.
Who’s On First?
When you copy a bunch of people, it often gets confusing about who’s supposed to do what. This “too many cooks in the kitchen” vibe can lead to nobody doing anything, because everyone thinks someone else will handle it. Being clear about who needs to take action can help mitigate this.
Oops, Did I Overstep?
Excessive use of the Cc and Bcc features in emails can lead to uncomfortable situations concerning privacy and confidentiality. Sharing information too broadly might inadvertently include individuals who should not be privy to certain details, particularly if the wrong contact is selected. Furthermore, it can result in someone feeling excluded if they were blind carbon copied (Bcc’d) and then miss out on subsequent group responses. Ever discovered you were Bcc’d on an email and nearly hit ‘reply all,’ only to realize that doing so would reveal you were secretly included by the original sender? Such moments underscore the delicate balance required in managing email communications effectively.
Trust Takes a Hit
Over-Ccing can also make it seem like you don’t trust your team to handle their business without being constantly watched. This can create a vibe of mistrust and even resentment, which is the opposite of what most of us want at work.
Emailing Smarter, Not Harder
So, how do we avoid these pitfalls? Here are a few tips to keep your email game strong without falling into the Cc/Bcc trap:
Think Before You Cc: Before you add someone to an email, ask yourself if they really need to be in the loop.
Respect their time: Chances are, you can fill others in with a summary chat or discussion at a later time without having them included in the day-to-day back and forth
Smart Use of Email Groups: Set up groups for specific projects or teams to make communication smoother without overloading individual inboxes.
Explore Other Tools: Sometimes, a quick message or a project management app is a better fit than an email. It can cut down on clutter and keep things moving.
Be Clear About Who’s Doing What: When you do send a group email, make it crystal clear who needs to take action to avoid confusion.
Email’s a fantastic tool, but like anything else, it works best when used wisely. By being thoughtful about how we use the Cc and Bcc functions, we can keep our inboxes manageable, protect privacy, and make sure everyone’s working as efficiently as possible. Here’s to better emailing!
Today marks a significant milestone, and I am thrilled to share this exciting development with you. Some time ago, Gaurav Mahajan invited Scott Brewster and me to join him and co-author Sudeep Ghatak in a collaborative effort that promised to revolutionize how professionals navigate Microsoft 365. The result of our collective endeavor is the book: “Microsoft 365 and SharePoint Online Cookbook: A complete guide to Microsoft Office 365 apps including SharePoint, Power Platform, Copilot, and more”.
This book is a comprehensive navigator for enhancing collaboration, boosting productivity, and harnessing the full potential of Microsoft 365. It covers a broad range of topics from SharePoint and Microsoft Teams to Power Automate, Power Apps, Power BI, and beyond, offering over 100 practical recipes designed to help you leverage Microsoft 365’s suite of tools to their fullest potential.
Published by Packt, this invaluable resource is now available for purchase. We were also fortunate to have Mark Kashman write a foreword for us, for which we are profoundly grateful. ❤️
Key Features
Enhance collaboration and productivity: Learn to use SharePoint, Teams, OneDrive, Viva apps, Planner, and Microsoft Forms to foster a collaborative and productive environment.
Automate processes: Build apps, bots, and dashboards with Power Automate, Power Apps, Copilot Studio, and Power BI, streamlining your workflows and processes.
Leverage Copilot: Explore how Copilot, the new AI virtual assistant, can provide seamless support in your everyday tasks.
Who This Book Is For
This book caters to anyone stepping into the world of Microsoft 365, from business professionals and IT administrators to enterprise architects. It offers valuable insights for establishing a contemporary, digital workplace effectively. Additionally, its comprehensive coverage makes it an excellent gift for Microsoft 365 enthusiasts in your life.
Join us in this exciting journey with the Microsoft 365 and SharePoint Online Cookbook. Your support is greatly appreciated, and I look forward to hearing about your thoughts and successes as you explore the wealth of information provided in this guide.
Efficiently managing and communicating team availability in a hybrid world is crucial for smooth operations in any organization. This guide will show you how to create an automated yet interactive system for tracking and communicating the availability of general staff members using Power Automate, Microsoft Teams, and SharePoint.
Weekly Availability Surveys: Each Friday, staff members receive a personalized survey through a Teams chat message to submit their availability for the following week.
Confirmation and Preview: Upon submission, staff members get a confirmation message and a preview showing the team’s availability as of the time they submitted their own.
Comprehensive Monday Update: On Monday, everyone receives a complete overview of the team’s availability for that week, helping them make the most of everyone’s availability.
Video demonstration
The following video will demonstrate steps 2-3 (building the SharePoint list, and walking you through the Power Automate flow).
Step 2: Setting Up SharePoint
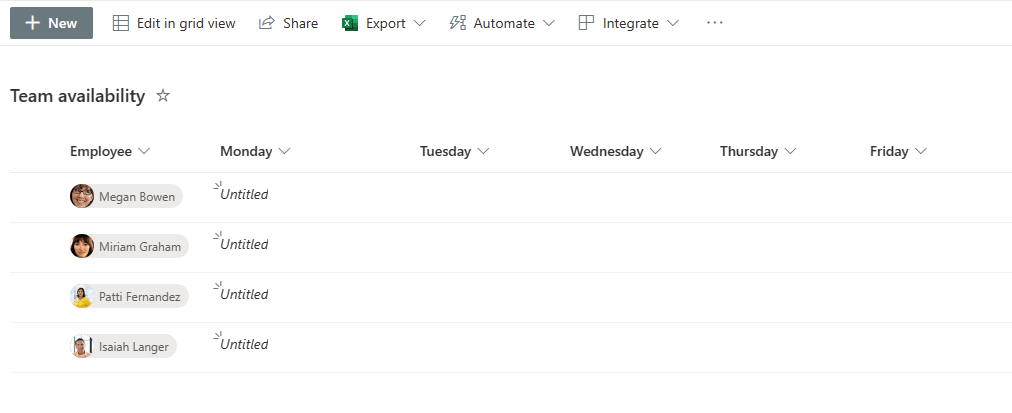
Create a SharePoint List: Establish a SharePoint list for logging staff availability. Ensure it’s accessible to all staff members who will be participating and/or reviewing availability of teammates. It needs:
A person column type for Employee
5 single line of text columns – one for each weekday. In my demo, I’ve repurposed and renamed the default Title column for Monday.
The supporting SharePoint list upon creation | Click to enlarge
Manage Permissions (optional): Assign appropriate permissions to staff members to view and edit the availability list. In order for someone to submit their availability via the chat request, they’ll need Contribute or Edit access at least. If you added the list to a site accessible to all relevant team members, they already have access to edit the list by default.
Step 3: Automating with Power Automate
In-Office Status Survey Flow:
Trigger: Schedule to run every Friday at 10:00 AM.
It should first gather data from the SharePoint list (Get items) to know whom to ask for their availability
Before asking an employee for their availability, I use the following in my Update item step’s Monday, Tuesday, Wednesday, Thursday, and Friday fields to reset them each week:
⏳ Requested
Post an Adaptive Card : The chat message to each employee uses the ‘Post an adaptive card and wait for a response’ action. For the Message of the adaptive card step, utilize the provided JSON below. The only thing you’d want to update is the company logo URL to include your own. You could also adjust things like ‘Telework’ to ‘Work from home’ or any other verbiage you choose.
Get the updated list of availability (Get items 2) including the new response, making sure to use the following filter query to only get rows where people have responded for the coming week:
Title ne '⏳ Requested' and Title ne null
After someone responds, they’ll get a chat preview of the whole team’s availability for the week.
In-Office Status Results Flow:
Trigger: Schedule to run every Monday at 9:00 AM.
This flow compiles survey responses into an HTML table (similar to how we did the first flow) and distributes it to the team via a Teams group chat message where they can ask follow-up questions, provide additional context, coordinate meetings, etc.
Important – Exclude the Sender: The sender/owner of the flow should not be included in the Monday communication to recipients (assuming they’re using their credential to connect for that step in the flow). Since they’re the one connecting to Teams via Power Automate, they’re already included in the eventual group chat. Attempting to include them will result in an error.
Conclusion
By following these steps, you can set up a streamlined and automated process to manage the availability of your team. This system not only saves time but also ensures clear and consistent communication among all staff members.
My newest video demonstrates how you can create a task in Planner whenever an item is added to a SharePoint list. In my example, I’m assigning Planner tasks whenever a new IT Support Request comes in.
For this to work, you’ll need:
A SharePoint list
A Planner plan for your team to share
How to automate Planner task creation based on SharePoint list additions
Prepare your SharePoint list (any columns you’re tracking)
Prepare your Planner plan (set up buckets, labels, etc. as you wish)
When you’re finished using a list in SharePoint Online, you may wish to delete it. Sometimes you’re at the end of a project and have no need to keep the list’s information, and other times you may have just been testing out capabilities and are ready to clean up.
Note You must be a site owner or site member to delete a list by default. List permissions can be changed, however, so that even as a member you may not have the ability. Check with your site’s owner if you’re running into an issue when following these steps.
Delete a SharePoint list
To delete a list in SharePoint Online, follow these steps:
Go to the list you wish to delete
Select the settings wheel in the upper right corner, then List settings.
Select Delete this list and click OK when prompted in your browser.
Location of Delete this list option | Click to enlarge
Restore a previously deleted SharePoint list
Items, including lists, remain in your site’s recycle bin for 93 days once deleted. Site owners have access to a second-stage recycle bin from which they can restore “double deleted” items (when someone empties the main recycle bin, or deletes a specific item from it).
As long as you’re within the 93-day window, follow these steps to restore a SharePoint list:
Go to your site’s Recycle bin (may be on the navigation menu, or in your Site contents (settings wheel in upper right > Site contents).
Select the deleted list
Choose Restore
Steps to restore a deleted SharePoint list | Click to enlarge
Here’s a video demonstration of the deletion and restoration process for SharePoint lists:
I had a unique challenge recently to alternate assignment of requests (tracked in a SharePoint list) to individuals as they were created. User #1 would get requests 1, 3, 5, etc. and User #2 would get requests 2, 4, 6, etc. To make it more interesting, different pairs of experts might be assigned to different request topics, and sometimes a single individual would be responsible for a particular topic. The overall idea, though, was a somewhat evenly dispersed workload given quickly and efficiently to those who were responsible for those request areas.
One (less than ideal) option to accomplish this is to use a Get Items (SharePoint) step on the requests list with a Top Count of 1 and Order By OData query (Created desc) for the most recently created request, see who the assignee is, and then assign to the other person in that category’s assignee field (when applicable). But I needed something that was better-performing, sophisticated, simpler in design, and not dependent on any historical items in case they were deleted, re-assigned, etc.
So, to determine the assignment as requests randomly trickle in over time, I decided to have Power Automate determine whether a new request’s ID number (auto-generated by SharePoint) is odd or even. Odd requests would go to the first assignee of a subcategory, and even would go to the last. If there was only one assignee in a category, they’re both the first and the last so it still works.
A general good practice when building flows is to make sure you don’t put a particular assignee’s identity explicitly in a variable, task, or email step. For example, you wouldn’t want to put user #1’s email directly in an Outlook email step’s To line. This makes sure that if an employee leaves the company, that the flow won’t need a revision. Instead, I created a list in the team’s SharePoint site with request categories, sub-categories, and responsible persons. My flow refers to this list each time it needs to make an assignment, making sure it has up-to-date contacts for each subcategory.
Example of a request categories list | Click to enlarge
The managers of the process keep this updated with no more than two assignees per subcategory. This way, when new employees join, the list gets an update for what subcategories they’ll be handling, and the flow continues without a hiccup.
What you’ll need to build this solution
Overall, for this process to work, you’ll need:
A list of request categories with these columns:
Category (choice)
Subcategory (text or choice)
Assignees/Responsible (person with multi-select enabled)
A list of requests (submitted via a SharePoint form, Microsoft Forms form via Power Automate, or Power Apps app via Power Automate)
I’d recommend Power Apps if you have the time and resources – this way your choices (categories and subcategories) in the form can be dynamic (only have to be managed in one place) and reference your categories list without granting access to the main request list, or even the SharePoint site, itself
Consider adding additional fields for your assignees like Notes, Status, Priority, etc. for them to add additional context, reminders, and status updates as they work the requests
The Power Automate flow for assignment determination
See the rest of this post to see how the rest of it can be built
How to build a flow that assigns tasks evenly and by category
The following video will walk you through the necessary components to build this flow in Power Automate. The result will dynamically assign tasks to responsible persons based on categories they’re responsible for, as well as alternating tasks to help distribute workloads more evenly within each category.
Ideas to enhance your categories list with additional fields for different assignment scenarios
Consider taking this concept further by adding additional columns to your categories list. Things like:
Sequential assignment (Yes/No) – Assign to the first person in the multi-select person field and if they don’t mark it complete within 2-3 days, add the second person as an assignee.
Assign to all (Yes/No) – Maybe some subcategories should have all assignees involved in the resolution. A simple checkbox would have the flow assign to both (when applicable).
Request specific assignment (Yes/No) – Not everything can be randomly or evenly assigned. You may wish to choose on a case-by-case basis. Set your flow up to send an adaptive card to the process manager(s) asking for selection of an individual for each request that comes in with this Yes/No checked.
That’s it! The Teams Administrator certification only takes passing this one exam to obtain. In this post, I’ll share both free and paid resources to help you prepare.
My MS-700 exam study guide with 168 practice questions
Ready for more? Check out Peter Rising’s and my MS-700 exam guide for in-depth exploration of the latest objectives. I recommend starting out by reviewing the objectives and focusing on your weakest areas.
If you use an exam guide or practice test, you’ll get a realistic idea of the types of questions that will appear on your actual exam. You can also check out some practice questions by watching my DC SP User Group recording where I shared some practice questions during the presentation.
MS-700 exam guide (2nd ed) table of contents
Plan and configure network settings for Microsoft Teams
Identify licensing requirements for Microsoft Teams
Plan and configure security and compliance settings for Microsoft Teams
Plan and implement governance and lifecycle management for Microsoft Teams
Configure and manage external and guest users
Configure and manage Microsoft Teams devices
Creating and managing teams
Plan and manage channels
Manage chat and collaboration experiences
Manage apps for Microsoft Teams
Manage meeting experiences
Manage phone numbers
Manage Phone System for Microsoft Teams
Monitor and report on a Microsoft Teams environment