One of the best perks of upgrading to SharePoint Server 2019 from previous versions is the introduction of the modern/new list, library, and page experience. Modern web parts and layouts become available, lists look sleek and closer to what users are seeing in O365 in hybrid environments, etc.
It recently came to my attention, however, that the new list experience in picture and document libraries doesn’t render image thumbnails. According to Mike Lee in this thread, thumbnails in the modern/new experience rely on a cloud-based microservice that is incompatible with SharePoint 2019. Users, instead, just see image icons where thumbnails should be:
The only workaround in SharePoint 2019 to see image thumbnails in picture and document libraries is to revert to the classic experience. Each user can do this for themselves if we leave the default experience setting, but we want to force all users to use classic and not have the choice of using modern if we want them to see thumbnails.
Go to User Voice and vote for this issue to be resolved, adding support for image thumbnails in SharePoint 2019 modern experience views. In the meantime, here’s how you can change a library’s default experience back to classic:
Set library view to classic experience
1. Go to Library settings (settings wheel in upper right > Library settings).
OR if you’re already viewing classic experience, Library settings is found in the Library ribbon menu.
2. Click Advanced settings.
3. Scroll to the very bottom and for List experience select Classic experience.
4. Click OK.
Now all users will see the classic experience and not have the choice of toggling back to modern where thumbnails cannot be shown.
I recently had the privilege to write a Microsoft 365 administration cookbook for Packt intended for M365 administrators. “Cookbooks” take a large topic, like M365 administration, and divide it into major subject areas each with their own set of “recipes” or step-by-step guides to complete popular tasks.
My friends Gaurav Mahajan and Sudeep Ghatak also wrote an M365 cookbook for Packt that is written for the end-user audience. I was honored to be able to write a foreword for their book, and am impressed with the amount of knowledge they’ve captured and shared in their nearly 800-page cookbook.
Embrace modern solutions to enhance collaboration, teamwork, robotic process automation, and business intelligence in your organization using powerful Microsoft 365 services (formerly Office 365)
Key Features
Gain a complete overview of popular Microsoft 365 services using practical recipes and expert insights
Collaborate with your team and external users effectively using SharePoint and Teams
Create no-code and low-code solutions, such as bots, forms, dashboards, and workflows, using the Power platform
Book Description
Microsoft 365 in an integrated suite that provides intelligent tools for managing everyday organizational tasks like content management, communication, creating reports, and automating business processes. With this book, you’ll get to grips with popular apps from Microsoft, with a focus on enabling workspace collaboration and productivity using Microsoft SharePoint Online, Teams, and the Power Platform to name a few.
In addition to guiding you through the implementation of Microsoft 365 apps, this practical guide helps you to learn from a Microsoft consultant’s extensive experience of working with the Microsoft business suite. Starting with a quick overview of the M365 ecosystem, the book covers recipes for implementing SharePoint Online for various content management tasks. You’ll learn how to create sites for your organization and enhance collaboration across the business and then see how you can boost productivity with apps such as Microsoft Teams, Power Platform, Planner, Delve, and M365 Groups. Using a step-by-step approach, you’ll also find out how to use the Power Platform efficiently, making the most of Microsoft PowerApps, Power Automate, PowerBI, and Power Virtual Agents. Finally, the book focuses on the SharePoint framework, which helps you to build custom Teams and SharePoint solutions.
By the end of the book, you’ll be equipped with the skills required to set up Microsoft 365 and SharePoint Online and be ready to enhance business productivity using a variety of tools.
What you will learn
Get to grips with a wide range of apps and cloud services in Microsoft 365
Discover ways to use SharePoint Online to create and manage content
Store and share documents using SharePoint Online
Improve your search experience with Microsoft Search
Leverage the Power Platform to build business solutions with Power Automate, Power Apps, Power BI, and Power Virtual Agents
Enhance native capabilities in SharePoint and Teams using the SPFx framework
Use Microsoft Teams to meet, chat, and collaborate with colleagues or external users
Who this book is for
This book is for business professionals, IT administrators, enterprise developers and architects, and anyone who wants to get to grips with using M365 for effective implementation of Microsoft apps. Prior experience with Office 365 and SharePoint will assist with understanding the recipes effortlessly.
Table of Contents
Overview of Microsoft 365
Introduction to SharePoint Online
Working with Modern Sites in SharePoint Online
Working with Lists and Libraries in SharePoint Online
Document Management in SharePoint
Term Store and Content Types in SharePoint Online
OneDrive for Business
Search in Microsoft 365
Office Delve
Microsoft 365 Groups
Microsoft Teams
Yammer – The Enterprise Social Network
Power Automate (Microsoft Flow)
PowerApps
Power BI
Power Virtual Agents
Planner
Custom Development – SharePoint Framework
Microsoft 365 on Mobile
Appendix
Microsoft Office 365 Administration Cookbook
Make the most out of your investment in Office 365 apps and services with this Microsoft Office cookbook
Key Features
Learn how to manage and secure the entire Office 365 stack in addition to specific services
Delve into newer and frequently shifting areas such as Power Platform, Microsoft Teams, and Microsoft Search administration
Discover carefully selected techniques that cover a range of administrative tasks of varying difficulty levels
Book Description
Organizations across the world have switched to Office 365 to boost workplace productivity. However, to maximize investment in Office 365, you need to know how to efficiently administer Office 365 solutions.
Microsoft Office 365 Administration Cookbook is packed with recipes to guide you through common and not so common administrative tasks throughout Office 365. Whether you’re administering a single app such as SharePoint or organization-wide Security & Compliance across Office 365, this cookbook offers a variety of recipes that you’ll want to have to hand. The book begins by covering essential setup and administration tasks. You’ll learn how to manage permissions for users and user groups along with automating routine admin tasks using PowerShell. You’ll then progress through to managing core Office 365 services such as Exchange Online, OneDrive, SharePoint Online, and Azure Active Directory (AD). This book also features recipes that’ll help you to manage newer services such as Microsoft Search, Power Platform, and Microsoft Teams. In the final chapters, you’ll delve into monitoring, reporting, and securing your Office 365 services.
By the end of this book, you’ll have learned to manage individual Office 365 services along with monitoring, securing, and optimizing your entire Office 365 deployment efficiently.
What you will learn
Get to grips with basic Office 365 setup and routine administration tasks
Manage Office 365 identities and groups efficiently and securely
Harness the capabilities of PowerShell to automate common administrative tasks
Configure and manage core Office 365 services such as Exchange Online, SharePoint, and OneDrive
Configure and administer fast-evolving services such as Microsoft Search, Power Platform, Microsoft Teams, and Azure AD
Get up and running with advanced threat protection features provided by the Microsoft 365 Security & Compliance Center
Protect your organization’s sensitive data with Office 365 Data Loss Prevention (DLP)
Monitor activities and behaviors across all Office 365 services
Who This Book Is For
This book is for newer Office 365 administrators and IT pros alike, and comes with recipes of varying difficulty levels along with step-by-step guidance. Whether you are new to Office 365 administration or just seeking new ideas, this cookbook contains recipes to enhance your organization’s app and service management and productivity.
If you have several servers in your SharePoint Server (on-premises) farm, repeating the manual steps for clearing the configuration cache on each can be time consuming. PowerShell really shines in situations like these to help us be more productive and efficient.
The following PowerShell script can be used to clear the SharePoint configuration cache on a server. I’ve recently tested this on SharePoint 2019 servers with success. Just be sure to run it on each server for which you’re clearing the cache, then remember to go back to each and press “ENTER” in each PowerShell window as the script instructs you so that it restarts the timer service after all servers have had their cache cleared.
This script follows the same steps you’d perform manually. It loads the SP snap-in if needed, stops the timer service, deletes the xml files in the Config directory, sets the cache.ini file’s value to 1 to reset the cache, then restarts the timer service (once you press Enter).
Clear SharePoint configuration cache using PowerShell
Run PowerShell as administrator (right-click, run as administrator).
Copy and paste the following script, making no changes to its contents. It will work as-is.
Hit Enter to run the script (unless using ISE, then click “Run”).
Repeat steps 1-3 for each SharePoint server on which you’re clearing the cache.
When this has run on all SharePoint servers you wish, go back to each and hit Enter in PowerShell to restart the timer service on each.
Microsoft 365 Virtual Conference for the community
If you’ve attended a Collab365 event in the past, you’re probably as excited as I am for the next upcoming iteration of their GlobalCon series.
You can join us on one or all of the following parts of GlobalCon3:
July 15th, 2020 (Beginner’s Day)
August 11th-12th (Power Platform Day)
September 8th-11th (Main Event)
GlobalCon2 had over 20,000 sign-ups this year and popularity is continually increasing. People are becoming more familiar with Microsoft 365 everyday especially as our workplaces embrace and improve digital and remote collaboration.
Spots are filling up fast for GlobalCon3 and you don’t want to miss out on the exciting things they have to offer! New features are being introduced this year that will allow for more networking and collaboration opportunities.
Register for free
Sign up is free but be sure to check out the amazing upgrade options they have to enhance your experience. Right now you can get them at a discounted rate (prices will be listed but are subject to change very soon!)
Get access to all the knowledge GlobalCon3 has to offer: Register (FREE!)
Or consider these content-packed upgrades:
All-Access Pass:
With the All-Access Pass you get lifetime access to every single GlobalCon3 session (and 10 EBooks), All content from the GlobalCon1 Summit (31 sessions and 10 EBooks), you also get their Teams Training videos by Matthew J Bailey MVP as well as the Excel training videos to share with your internal teams.
I’m thrilled and humbled to have had the opportunity to be a guest blogger over on Microsoft’s Humans of IT (HoIT) blog. My post is about balancing all our obligations, embracing imperfection, and leaving room for joy in our endeavors.
It can be difficult to keep up with all the messages in LinkedIn that come in from colleagues, old friends, recruiters, and bots. Even if you have every intention of replying at a later time, your message buddy can see that you’ve seen their message but chose not to reply immediately. This can add false tension or anxiety to the communication, or just send a signal to the other party that’s unintended such as how you might value that person or their objective. Your message buddy can also tell when you’re typing and may be anxiously awaiting what you have to say even if you change your mind and delete the draft, leaving them hanging.
Let’s reduce some stress and disable read receipts and typing indicators so you can reply when you’re able with the peace of mind that no unintended feelings were conveyed when skimming between meetings. Just keep in mind that if you do this others won’t see that you’ve read their message or a typing indicator when you type AND you won’t be able to see the same from anybody else. Disabling it from applying to you removes your ability to benefit from it applying to others.
How to disable typing indicators and read receipts in LinkedIn messages
By default your LinkedIn profile may appear in public search results and individuals who aren’t logged in to LinkedIn can see some of your information (depending on the privacy settings of each component as you added it to your profile). This public/anonymous access is also what allows Outlook to find your profile as a potential match for you if you haven’t connected your profile yet.
In this post we’ll go through the steps to disable your public profile so that only logged in users may connect with you and/or view your profile in whole or part depending on your settings. You can also watch a video demonstration at the bottom of this first section below.
How to disable your LinkedIn public profile from anonymous access
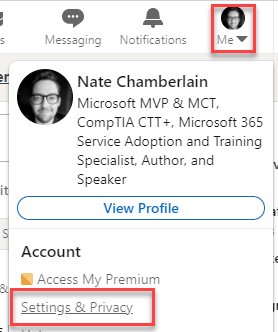
2. Select your profile menu then Settings & Privacy.
Click to enlarge
3. Click Visibility (on the left) and then next to Edit your public profile, click Change.
Click to enlarge
4. Toggle the Edit Visibility option to the off position. It saves automatically.
You could, alternatively, just restrict which content appears publicly. Instead of step 4, leave it toggled in the on position and choose which items below it should be available.
As you make changes, the preview on the left will update to show you what anonymous users will see when on your profile but not logged in.
How to disable access to your profile for LinkedIn partners and permitted services like Outlook
I still see a lot of LinkedIn profile URLs including generic alpha-numerically decorated user names. Let’s clean that up and make it unique and intentional.
For example, if you don’t change your URL it may still be something like:
….linkedin.com/in/nate-chamberlain-ab1234567/
But you can update it to something that looks great on a resume and every other profile, such as:
Mark Rackley recently tweeted about the ability to create a calculated column in SharePoint online document libraries that would automatically render thumbnails for documents. In the GIF from his tweet, it shows how this works for media files.
— Mark Rackley 🐗 @NACollabSummit @Techsplaining (@mrackley) May 14, 2020
Naturally curious, I had to see how this worked for documents of .docx, .pdf, .pptx, etc. types. What I found is that it only currently supports some file types:
Supported file types (there’s likely even more I didn’t test):
Word (.docx)
PDF (.pdf)
Emails (.msg)
Images (.png, .gif, .jpg, etc.)
Media (.mp4)
Not-yet-supported file types:
Excel (.xlsx)
OneNote (.one)
PowerPoint (.pptx)
Create a thumbnail column in SharePoint Online document libraries
1. Add a new column to your document library (library settings > Create column).
2. Set the column name to Thumbnail. As for type, you have two options:
Leave type as Single line of text. Thanks to Dario Cassinerio for sharing that Single line of text type works as well as (and more simply than) Calculated set to [Title].
Mark Rackley suggests sticking with Calculated set to [Title] (see example screenshot) to prevent users from editing the text field in forms.
3. Click OK.
Supported file types will have thumbnails rendered (like .docx and .pdf in the example below) and others will just be blank (like .pptx and .xlsx in the example below).
Click to enlarge
Here is an animation demonstrating the entire process, start to finish using Single line of text as column type:
Click to enlarge
And another animation but using the Calculated column set to [Title] type:
In this age of building bots and eliminating needless clicks and such to get employees the info they need faster and more directly, we need all the best practices we can find when creating solutions for users. This post will share a better practice when it comes to getting reliable, fast results from SharePoint lists and libraries that don’t rely on search index configuration or endless view sprawl.
Quick answer
If you’re just here for the quick answer, here it is. For string values, you can simply add this to the end of the list’s URL to filter it as specified.
Spaces in field names and values: If your value includes spaces, replace them with %20.
[IntFieldName]: Internal field names (like Client in the example below is actually the original Title column) can be found in List Settings > Column Settings > Select Column > Check URL of column settings page (it contains the internal field name following &Field=).
Click to enlarge
If you want to learn about how this came up in my work and why I chose it as a solution, read on.
Case
Recently, I was involved in troubleshooting a bot that would search a SharePoint list using its built-in search box. However, the bot would be searching for items that were created minutes prior and the search index hadn’t updated yet so no results would be found and the bot would fail to complete.
So I suggested we filter instead of search.
Why filter?
Filtering lists works independently of the search index. Meaning I can create a new item in a SharePoint Server 2019 (or any SharePoint version) list right now and then filter the list and find that new item immediately. But if I search immediately, it won’t be found yet.
Want to argue about continuous crawls as workaround? Send your thoughts to nothanks@natechamberlain.com.
Changes to the process
For this particular bot, we’d be replacing this process:
Navigate to SharePoint list URL
Activate list’s search box
Enter/type search term (unique item identifier guaranteed to return one result)
Hit enter/search
with this one:
Create a variable for the search term
Navigate to SharePoint list URL with added URL parameter including variable from step 1 (taking us directly to the single result we needed)
It not only simplifies the steps involved, but reduces the likelihood that changes to UI elements will break our bot along the way.
Potential use cases
Sending workflow emails with direct links to lists and libraries already filtered
Reducing the number of views on a list by having users bookmark URLs including the filter parameters the view would have
Improving bot reliability by eliminating some UI-dependent steps
Eliminating search indexing delays for users or bots searching for new items
Setting a hyperlink column on a list automatically to filter the list/library by that item’s vendor/client/topic/etc. for easy comparison/drilldown (see how to set a hyperlink column using Power Automate)
How to do it
First you need to identify the internal field name of your column on which you’ll be filtering. Then we simply add a bit of text to the end of the list’s URL.
Go to Settings > List settings (or List/Library > List/Library Settings in classic views).
Select the column to filter from under Columns.
Check the URL for the text following &Field= for the internal field name. Note this somewhere as we’ll need it soon.
Go back to your default list view ending in .aspx and add the following to the end of the URL, replacing [IntFieldName] with the field name you got in the previous step: ?FilterField1=[IntFieldName]
Now add the following to the end as well, replacing [FieldValue] with what you’d like to use to filter the column referenced in steps 3-4. ?FilterValue1=[FieldValue]


